Synoptic Project – Scrum 30/04/18

Today’s Scrum was very quick and simple compare to previous weeks. Everyone  was present for this scrum and everyone knows what they are doing. Currently I am happy with the groups progress and the level is starting to look great. We’re only really missing the WebGL and VR versions however once the primary level is complete this can be easily done. This is the only real issue other than the UI not being done. This week me and Ben will be working on smaller assets as well as level tweaks after the MVP feedback. Kurtis is looking into the raycast and WebGL and Luke will also be working on some smaller assets. Today is the day of the MVP deadline and due to this I will be doing a large project update post later on; this will go more in depth with where my group is at

30-04-2018

Synoptic Project – Creating a Cafe Chalkboard

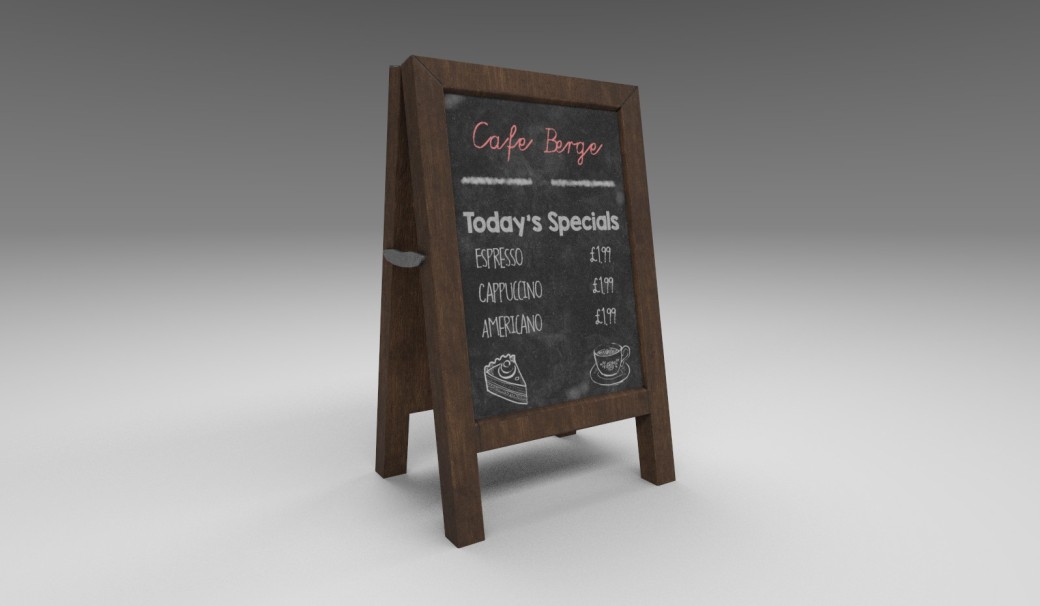
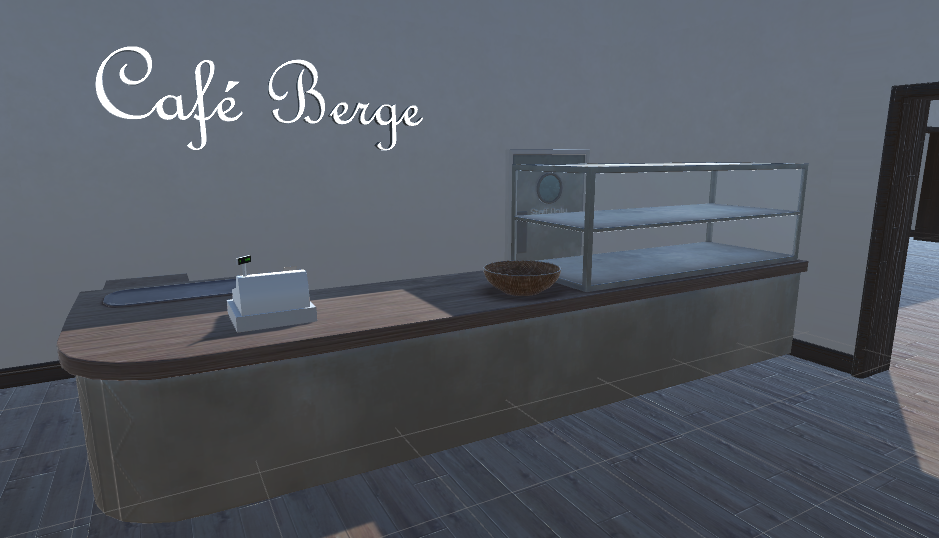
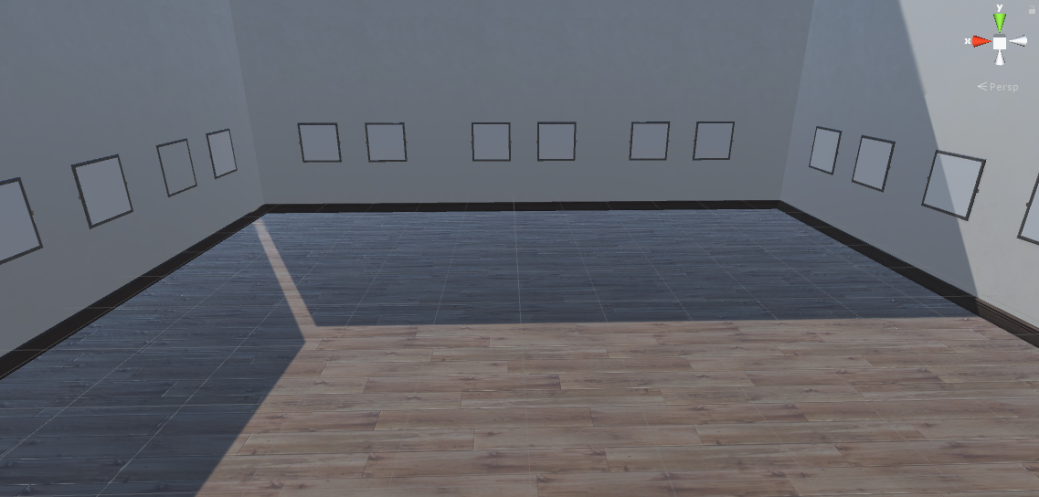
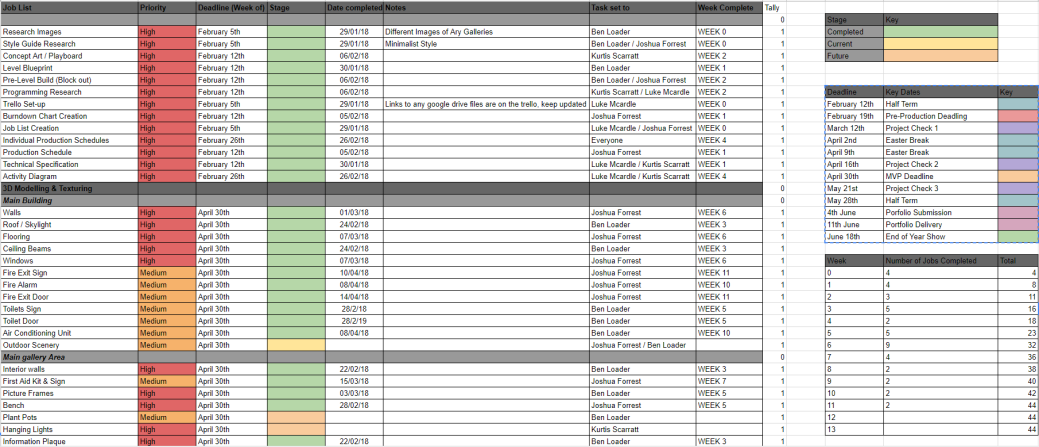
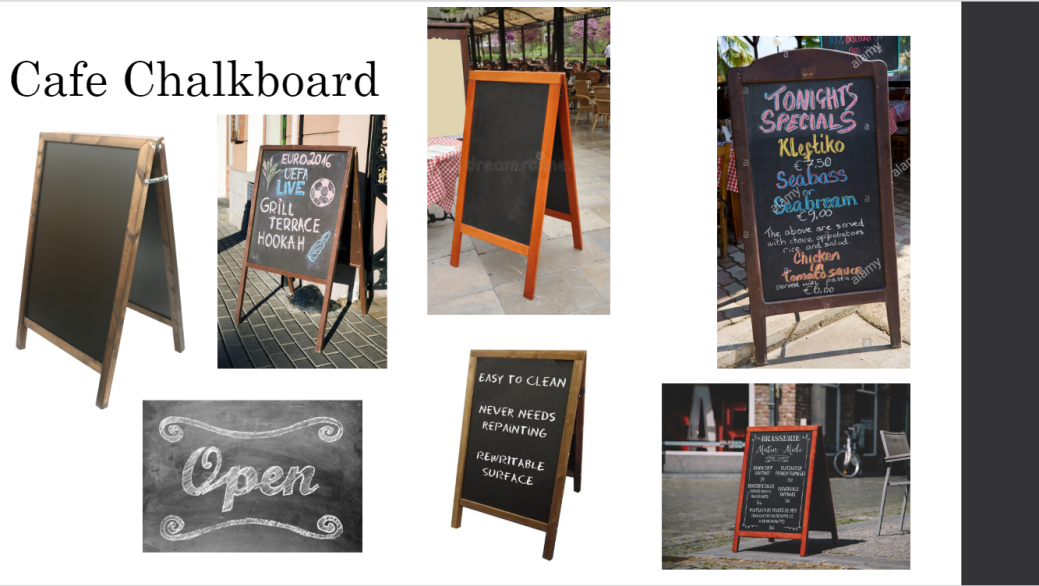
Rather than having a sign outside the room of the cafe I had an idea of having one of those small chalk boards that include the name of the place as well as listing either the menu or the specials. Due to this my research images consist of this object but with a couple of different types.

Research.PNG
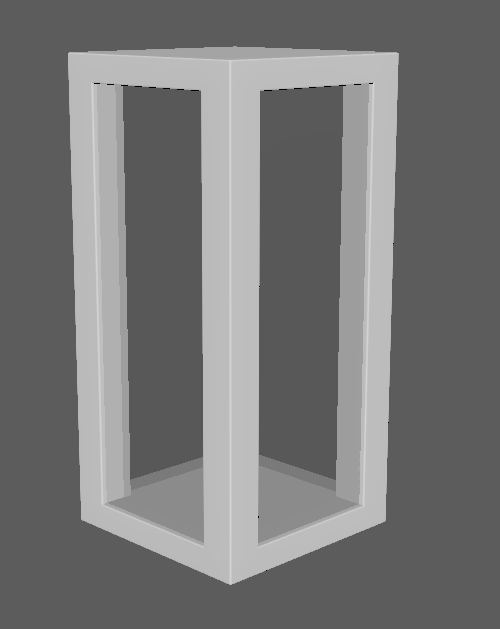
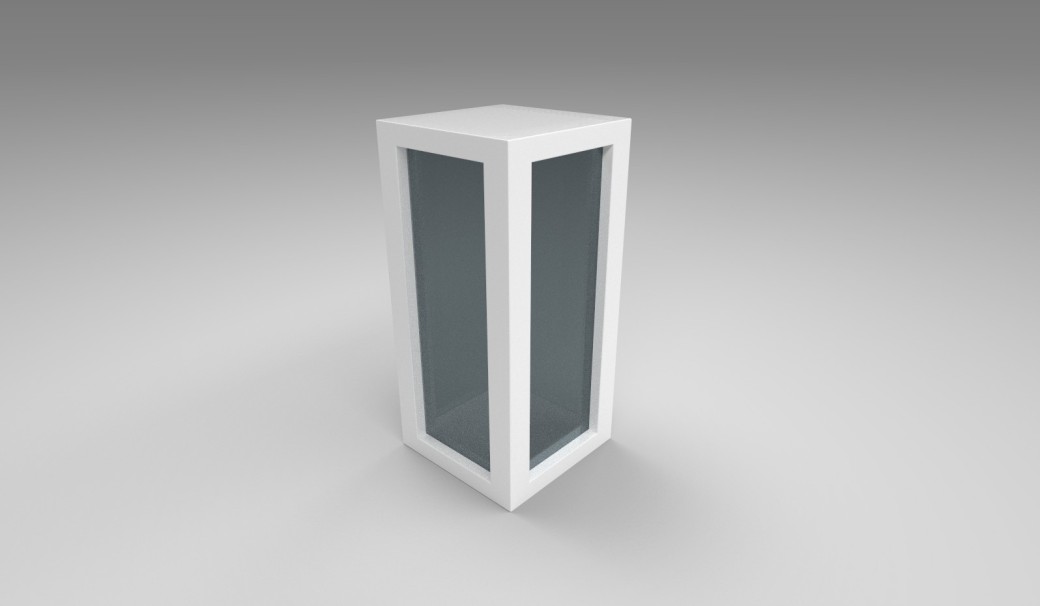
The creation of the asset was a little more complicated than expected due to making a mistake with the mesh at first. This was quickly resolved and I was happy with its look.

Mesh

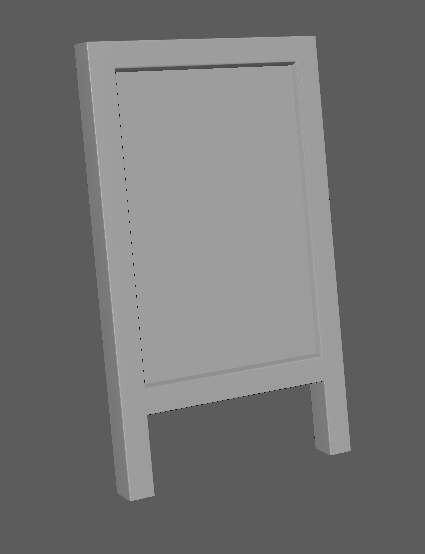
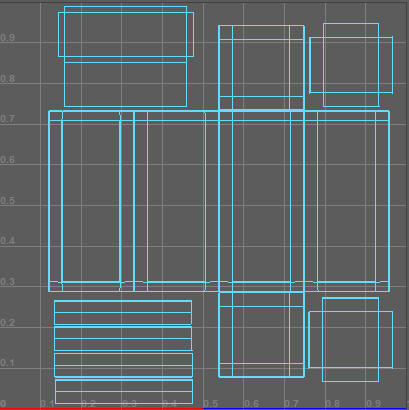
I sorted out the UVs of the first side and then duplicated this. UV Check

I then combined both of the meshes.Complete Mesh

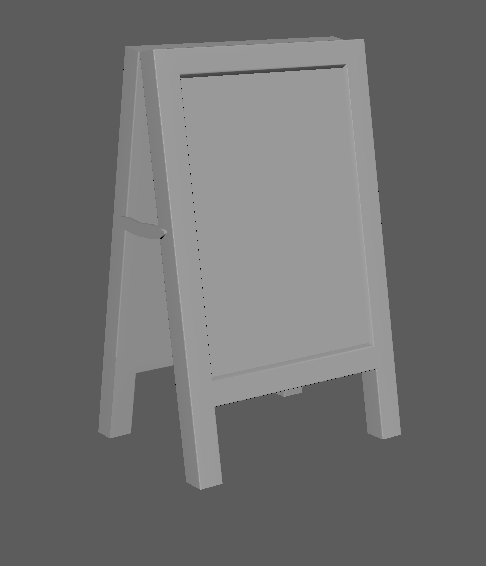
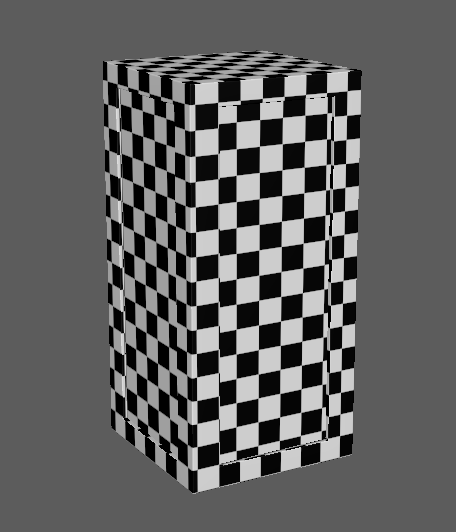
I think I did a really good job with the UV unwrapping. I took up almost all of the space that was given and the meshes unwrapped  very nicely.

UVs

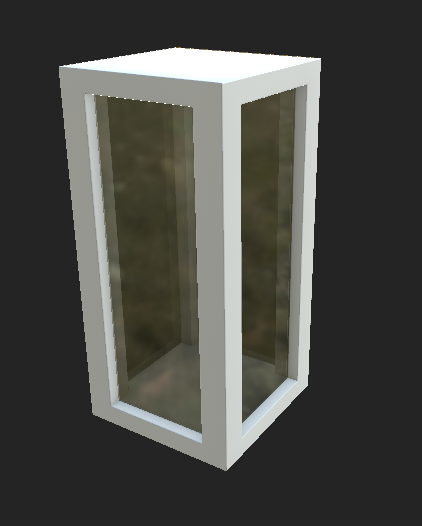
For this I did source a chalk board texture from substance share but I also added my own chalk markings using the various brushes within substance. From the beginning I could tell that most of the detail in this model would come from the texture. This was the longest part of this model. Texture

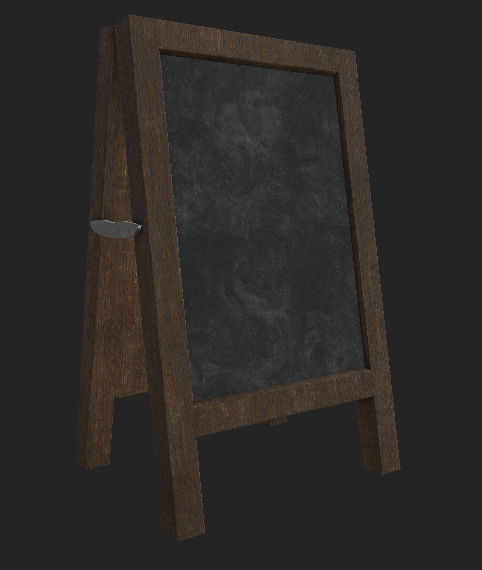
From my research images I could see that the wood on these types of chalk board were fit together like a jigsaw. Due to this I added smaller details like this into the texture. I made it look as if there was a joint in the wooden frames.Other Normal Detail

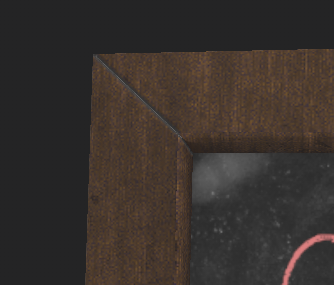
I also added some normal detail the metal clips on the side of the mesh, so it did not look like it was just hovering. Normal Detail

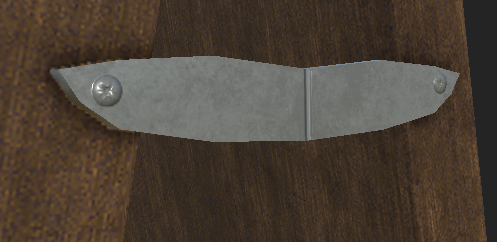
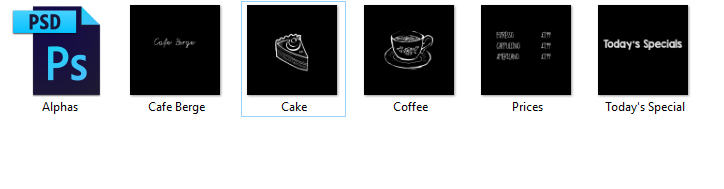
I made sure to correctly name all of the alphas that I had created and put them into a resources folder in case I needed them on a later date.

AlphasI then stamped the alphas onto the menu board. When creating the chalk writing I made sure to use a couple of different fonts like in the reference images. I also made the name of the restaurant a red chalk so that it would stick out more than the rest of the information. I had a really fun time texturing this asset.
Chalk Detail

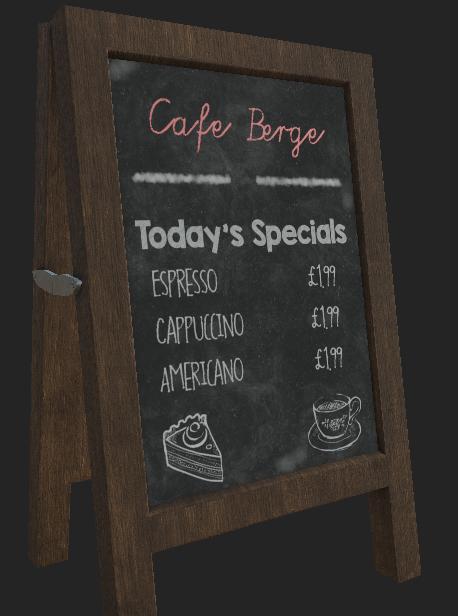
This was my substance render.Render

Synoptic Project – Updated Level Screenshots

Ben has been putting a lot of work into the main environment this week due to him downloading the most up to date build from the google drive and further developing the level. I have had some small inputs while the building process has been done however one key feature that has been added by Ben was the baked lighting. This has added a really nice effect to the level and ended up looking much nicer than what I had originally anticipated. Other than this some new assets have been imported into the scene and small tweaks have been made so that the level is prepared for the Minimal Viable Product deadline on Monday.

This slideshow requires JavaScript.

From the very beginning of the project I had planned to take screenshots that show the different development stages of the level. With the rebuild I was able to do this with a more streamlined look with minimal camera movement. I set up the screenshot camera at the beginning of the rebuild and took one every so often. This is the result so far.

Test.gif

Synoptic Project – Creating an Egyptian Vase

Me and Ben were having a discussion about parts of the rooms seeming rather empty. Due to this we discussed filling in some of the areas. We also got some feedback from the lecturers to possibly include more art / antiques in the scene. Due to this I wanted to create a small vase that could go on one of my pedestals. From my research I really liked the look of the Egyptian style so I knew this is the style I wanted to use for the texture.

Research

I messed around with a couple of different ideas for the shape and then I had noticed I had an asset from the synoptic project that could actually work in this scene. Only some small changes would be required to update the model and allow it to fit with the overall environment. The first thing I did was open the old Maya file and soften some of the edges so that the asset would look more rounded. I also merged the vertices at the top of the model so the vase looked sealed. Updated Mesh

Once I re-imported the mesh into the substance file it looked a lot more rounded and had the desired effect. One thing I actually really liked was the black and gold color scheme so I chose to not change this. I ended up spending a lot of my time for this asset creating different alphas that I could place onto the asset to create cool patterns that would fit with the style I was going for. I used the alphas in a mask and had the patterns be the same golden material as the edges. Texture 2Texture 3Texture

I really liked the look of this asset in the render. This asset will be imported into the scene before the MVP.Render

Synoptic Project – Creating a Pedestal

From the beginning of the project we knew that we would need some sort of pedestal that could be used to hold up the projector. Originally I had the idea of an older looking one as I thought it would have a nice contrast with the modern building and suit the overall tone. However from research I chose to go for a different more minimalistic approach.

Research

At first I was leaning towards the idea of creating a basic rectangle that objects could be placed on, once id chosen to go for a more modern look. I thought this would fit the scene well but it was a little boring. due to this I chose to make some gaps in the mesh which would have glass plains placed into them.

Mesh

I bevelled the edges to give the soft look that was in the reference image.

Bevel

Due to the simple shape the UVs were really easy and quite fast to unwrap. I managed to sew most edges together which let me have a nice clean UV layout.UV Check

All the glass panes were the same object therefore I had their UVs layered on top of each other.UVs

Before exporting the fbx I wanted to make sure that the model would actually work with the transparent material on the plains. I tested this using the Maya shaders. One problem I encountered after I exported was that the glass was far too thick and looked a bit ridiculous, because of this I made it thinner.

Shader Set up

The texture I was going for was just a simple white glossy plastic as well as a nice semi transparent glass. Due to the simplicity not much other would could be done to the texture or model. Texture

This is the render. Render

Synoptic Project – Continued Level Progress

Today me and Ben worked together in continuing to build the level. My rebuild the other day was a success and due to having more assets in that in the previous build we are actually now more ahead. Today was spent putting in some assets that we either did not have at the time of the rebuild or assets that still needed implementing into the level. One key element that was added was Ben’s newly finished cafe counter that came with different components in the image below. This helped fill the cafe area a lot and now the room is looking a lot more full. All that is left for this area is little things.

Cafe Berge

I added my company name into the lobby reception and it had the desired effect. It sticks slightly off the wall and has a nice metal finish.Company name

This next part that was put in was really important for the client. He wanted the exhibition description placed onto a wall just outside of the gallery area. The description was also accompanied by a photo which I included on this wall.Exhibiton Description

We also sorted out the glass material again and placed this onto the revolving doors and windows. Glass

One part of the project that will be done later this week is dragging all of the different photos into the scene and placing them in their designated frames. Picture Frames

We also placed the roof back into the scene, this along with the air conditioning has a really nice effect.Roof

This is the progress screenshots from today. Loads of little other tasks were done such as duplicating different items around such as the fire alarms etc. We also had a go with some reflection probes to see how they worked however this is still a work in progress and were not quite sure how they will be used within the scene yet. The next step will be to sort out the lighting before the MVP deadline as well as implement some of the code Kurtis & Luke should be working on.

This slideshow requires JavaScript.

Synoptic Project – Creating a Company Name to go on the wall

A while ago I began to model the company name so that we can put it on the wall behind the reception desk in the art gallery lobby. The model itself was not hard to create as I used the text tool, this was the first time I had actually used this tool and it was simpler than expected. I did some research to find out how to use this tool. I also spent some time playing around with different fonts to see what I think would suit the Art Galleries theme. I then went onto the Darling Media Group website and the first thing I saw was a simple streamlined text. Due to this I decided to go for a simple font.

Research

I liked how the text was looking and I was happy with the outcome. One problem with the text tool was the fact the fronts of the letters had engons, due to this I had to triangulate the mesh. I also used the clean up tool to make sure the model did not have any glitched faces or edges.

Model

I then automatic UV unwrapped. Due to the simpleness of the text I think this was an okay way to UV unwrap the model. I then sewed the necessary edges together. I also put the words in order just so the lay out was nicer on a whole. I tried to take up as much space as possible on the UV map. This process took me a long time due to how many different shells there initially was; there was a lot of sewing to do.

UVs

The reference images I was looking at were very minimalistic. The texture used was a simple flat metal that looked polished. It stands out from the wall while also keeping a simplistic feel. I believe that the font I used helped me with this approach and when it came to texturing I just simply used one of the metal materials that is already plugged into substance. Texturing took no time at all and I was happy with the result.

Texture.PNG

This is the render, it does not stand out too great due to the colour of the background but I will be posting images of it in the scene on a later date.

Render

Synoptic Project – Scrum 23/04/18

Today’s Scrum was a little longer than usual due to it being our first Monday back in college and lots of work needs to be done in the coming week due to the MVP deadline being on the 30/04/18. One issue we discussed was the fact that I had to rebuild the level which was discussed last week however I gave an update on this and the progress is going well. Our opinion on the overall progress is that we are doing really well and its primarily just coding work and lighting that needs doing for us to reach our MVP goal. The level is starting to look pretty full with models which is great and its all coming nicely together however there is still some room for things we need. This week Ben is doing some general work from helping me to programming to also making some smaller assets to fill some of the empty spaces in the scene, especially the cafeteria. Kurtis is continuing to work on the UI and getting the information to pop up when the player looks at the plaques. Luke will be continuing to add features to the main menu. One key feature will will be adding is a set up so the player can select night or day in the menu so the level will load at that time. I will be continuing to build the level as well as attempt to do some early lighting as well as making some smaller models for the areas.

Scrum 23-04-2018.jpg

Synoptic Project – Rebuilding the Level

One major mistake that we have all made was using slightly different versions of Unity. The level was working however we were having some smaller issues to do with broken textures as well as the lighting not working correctly. I think this may have been the issue and because of this I have spent today rebuilding the level from scratch in Unity 2017.1.3f1. This was very time consuming but I had a lot of fun doing this. A mistake I made during the building process was that I used the incorrect walls as they still had inside faces, these faces would cause lines to form between each panel resulting in the textures not being seamless. Due to this I had to re-import the wall assets which meant I basically started again twice. Me and Ben were sat on discord while I was building the level and he had input on many of the different assets and where they should be placed. We discussed were we thought the best place would be for some assets and agreed upon all the areas that things have been placed. I placed the animation scripts onto the revolving door as well as the air conditioning units fan so that the scene did not look as static and the detail it added was nice. Below are some in progress screenshots showing the level being built up from the first flooring area to having all of the walls up.

This slideshow requires JavaScript.

Other than this I have also gotten to have a look at a few of my assets I have created over the course of the last few weeks that had not been in engine until today. I am really happy with the result on most of my models, one piece of early feedback I received as well as some feedback I also got from Kurtis was the actually change the wall texture as it looked busy, I agreed with this and today I also managed to import the new texture for it. I think it looks much better. The Vinyl writing on the wall also sticks out a lot more and has the effect I wanted it to have.

Old –

Render

New –

Wall Improvement.PNG

Below are a few of my other models that I have imported into the scene. I am really proud with how all of them have turned out as well as how nice of an effect I think the emissive map on the fire exit.


Level rebuild.PNG

Synoptic Project – Project Check 2 & Overall Progress Update

Overall I am happy with my groups project at the project check 2 deadline. I feel that some people have contributed more than others however this should be changing over the coming weeks with our MVP only two weeks away. The most important job at the minute is the lighting as when this is done the MVP will be ready for our main level. However for our actual final project we need to have more code implemented and the three different builds of the game. At this point this is looking very achievable. A couple weeks into the project I changed a lot of the documentation around to fit a new specification which involved another build of the game where the player would try to steal the art. Me and my group agreed that we would have been able to get it done however rather than one really great looking project we would have ended up with two average looking projects. Due to this we agreed to speak to the client and ask what he would like. He agreed to focus on the Art Gallery level build without the robbery mechanics. Our feedback states that we are close to the MVP stage and I agree with this, Kurtis has created a build of the level with the webGL. It just reached the requirements as we did not have lighting set up correctly; we are also looking into possibly making the web build smaller by not including the cafe or theatre room due to the restrictions. Another key feature that we need to include from our feedback is the loading screen scripts so that our game must fully load the components before the level starts.

One clear piece of feedback we received was the Art Book breakdown which is required as art for our final product. I already have an idea how this will be done and I will begin the documentation before the MVP.

kkkk

Once the project check was done my first task was to go back through the documentation and create some changes to suit a new plan, due to the removal of the robbery game. The first thing I did was change the key dates back to there original by pushing the MVP deadline back to April 30th. By this date we need the main game build including the models and lighting. Some of the less important models may be added on a later date due to other more important jobs taking their place.

Date Change

Once the dates were amended I went back into the job list for a third time and made some more changes. I added different tasks such as creating the loading screen script for the level as this was a new job. I also went through and removed all of the jobs associated to the robbery game.

Job List 1Job List 2Job List 3

Once the job list had been changed and updated I created a tally to see how many jobs there actually where, I then updated the burn-down chart with this new number and made all of the necessary changes to this.

Burndown.PNG

So far in the project my group has always been ahead on how many jobs we had actually completed compared to how many were expected to be done, however at this point it may look like were falling behind slightly due to all of the different jobs that will not be fully completed till the final deadline. Overall I know my group are on track to completing this project and the final project will look really great. From the job list and burn down I can also see that over half the jobs have been completed and many other jobs have been started to some extent.