


As the wall panels were finally complete and some other Assets were done we could begin to build the Art Gallery within Unity. I started by building up the level with the walls, I already knew the shape and size of the gallery due to the pre level block out and my own mini block out within Maya. Each room is sized at 12m x 12m and there are 5 of them. Each room will serve its own purpose, for the MVP we will have at least 4 of the rooms fully completed and as a stretch the fifth will be done also, this will be the cafe area. This room was made the stretch due to it not really having much of a purpose other than to complement the level. We have only just scratched the surface with the level development and we will continue to add and build onto it as the weeks progress. While me and Ben were setting this up, Luke was working on creating the main menu, which will be added to this project once it is complete. Overall I am happy with the progress that my group is making and the communication and team work so far has been very constructive for the synoptic project.

Other than just building up the foundations of the building I also stole some code from the Unity forums that will allow us to take HD screenshots as we progress through the development. I am hoping this will allow a cool little time lapse that can be put together for the end of year show.

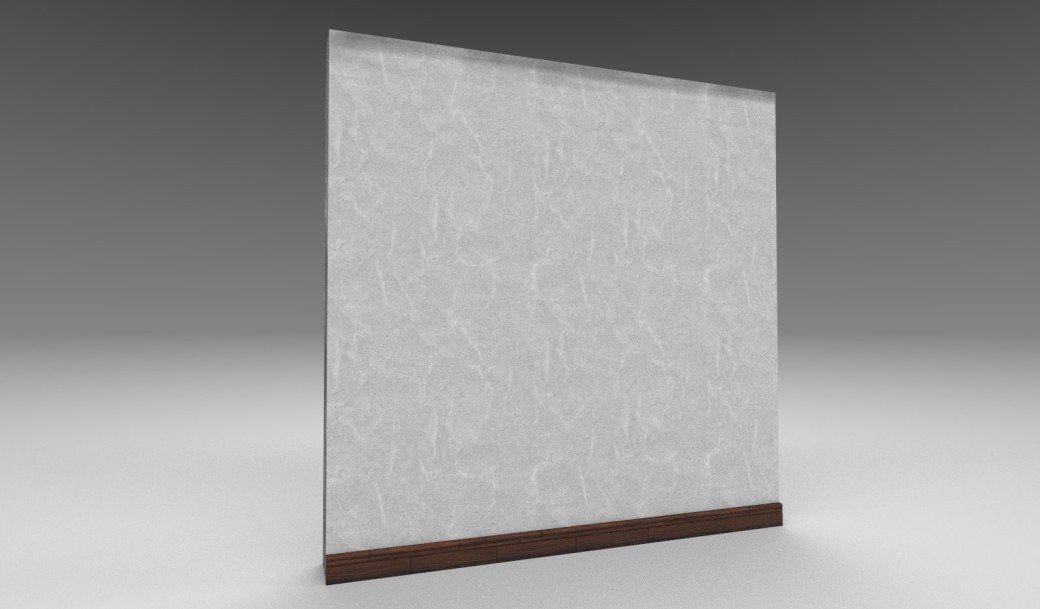
A week ago I had modelled and unwrapped the Wall Panel assets and began to experiment with different materials and textures. It took me a few to find one that I liked and I ended up using a mortar material and adding some darkness around the edges. I got some help from Ben for this as I was not 100% sure on what texture to use and a second opinion was very helpful. Other this this I also intended on creating a separate asset which would be the skirting board which I decided would be best to model and texture with the wall to make it a bit simpler. I also added the skirting to the Door Panel and made the skirting and the door frame texture match in colour to fit wit the overall style. Below are the substance renders of the Panels.

This is what the walls look like in engine, as pointed out to me in feedback there is a little bit going on for a white wall as there is details going on. Due to this I may change the texture in the future but currently I am going to stick with this to see what it looks like once some of the other assets are in.
The next step in the building creation will be to make the windows. Ben has already designed and created the roof which can be seen here.

Every group member was present for this weeks main scrum. Currently we are on track to finishing our work by the deadline and we are one job ahead overall. Last week we received news from the client that he would like a 3D thief game creating where the players objective is to steal the art. I made some changes to the production schedules because of this but nothing is set in stone, it is currently our primary stretch goal. I have changed my groups MVP deadline to the 16th of April and if we finish the VR Art Gallery by this date then we can begin the stretch goal, I believe my group has enough time to complete the main game and the thief game but nothing is set in stone. I have also added the key dates to every individual production sheet.
In this weeks scrum we discussed the possibility of the thief game and different things we could do to make it good. This week I will be finishing the wall assets and importing them into Unity. I will also be modelling and texturing the computer mouse. Ben will be starting some more of his assets, Kurtis will be doing some VR scripting and Luke will be starting to create the main menu for the game.

Scrum download link below –
While I had some spare time today I chose to create a new asset sheet, there is already a huge list of assets on the job sheet however it does not have the functionality to show what stage of development the model is in. I could have added a few new columns to the job list however these would have only applied to the modelling jobs and would have messed up the job sheet. I decided to go back into my imagine worlds folder and steal the asset list from there and change it to suit the synoptic project.

This will allow me to keep track of everyone’s progress for each of the individual assets and as me and Ben are primarily modelling we will be able to keep track of our own progress.

Once I was happy with the computer I knew that I needed to create some peripherals to go along with the device. As I had taken inspiration from an Apple Mac for my computer model I decided it would be best to model the keyboard and mouse using the Apple ones as reference again. Mac keyboards are rather simple in nature however placing each key and making sure they were the correct size was a surprisingly time consuming task. I was trying to be very precise with the measurements of the keys so they would all fit nicely together similar to my research images.


When creating the keyboard I used the mac I had created as a bit of a reference for sizing to make sure they would fit nicely together.

When I was confident the mesh was completed I began to UV unwrap, also I learned from my mistakes with the Mac. I made sure to use the clean up tool and check that I did not have any engons before export. I laid the key UVs out in the order that they slot into the keyboard. This made it more efficient for when it would come to texturing as I knew where each letter and symbol would be placed.

Texturing took around the same time as modelling, this was due to having to use the text tool in substance and keep changing the letters and placing them in the designated areas. for the base material of the keyboard I used the same metal that the Mac was made out of so that it would fit the same style and for the keys I used a plastic PVS matte material as this looked close to the reference images.

This is a substance render of my keyboard.

After looking at the keyboard for a little time I really did not like how the font looked, it was the best that substance painter has installed as the others look very robotic but this font also looks rather out of place. I had also got some feedback from some peers and they also said the font looks a little weird . Because of this I chose to go into Photoshop and create my own texture for the keys using a font in there. I exported the UVs from Maya and imported them into Photoshop and then put the correct symbols in the correct areas. I then removed the UVs and background colour, saved the image as a png and imported it into substance as a texture.

Once this texture was imported I rendered the model again and I think this looks much better with the revised texture.

The next model I had to complete to go with the computer was the mouse. As I had created a MAC and the keyboard to go along with it I needed the mouse to fit the same style.

This was my first attempt at the creation of the mesh, however it was very messy and did not look that good, it was also more square and it was not really the shape I was going for.
Due to this I restarted the mesh and took a lot more time creating it, overall it ended up looking better but it was still a little weird. however the basic shape was there and for such a small model within the scene I think this will suffice. 
I then UV unwrapped.


When it came to texturing I chose to use the same metal that I had used on the keyboard and computer so that the overall style would fit, however for the top of the mouse i used the same shade of white but instead of a matte plastic I used a shiny plastic. I also added the black line between the metal and the plastic as this was on the reference photos.


Currently I am a little bit ahead on my synoptic project work, I have been creating the building assets in college as well as texturing them and due to this I have been doing some different models from home. Today I began to work on modelling a computer. Of course the first step in the creation of this model would be to research into different types of computer. As it is meant to go into a business environment I chose that an all in one machine would be the best option as you often see these in receptions and other similar environments as they take up little room. While researching these devices I had came across a Mac and chose that this would be the best source of inspiration for the model. The client also works for Apple and I thought this may be a nice touch to the level for him.
I started off with the simple shape and began to model, I used reference images from the apple website for this. Soon enough I had the model done. It took me a little bit of time to get the shape right however I think I got it pretty accurate to the actual device.


Once the model was created I UV unwrapped the object, which surprisingly did not take as long as expected. 

once this was done I moved onto texturing. For this I just followed the exact same colour set of a Mac so it would be true to the design.

However at this point I had noticed I had made a huge error while modelling the object. It had many different engons all around it that I had unknowingly missed. due to this I went back into maya and fixed the mesh. The topology is semi nice but the model now works which is great. As you can see below I triangulated some of the different areas.

Just in case the mesh had changed slightly I chose to texture the updated version of the model to make sure everything was working, this time I did not get an error about triangulation. However in this phase Ben mentioned maybe changing the apple logo to something else for individuality; this was a good idea and it also crossed my mind that maybe I could not include the Apple logo in the game due to copyright. Because of these reasons I decided to create a parody logo.
![]()
This is the render of the fixed model, with updated textures.

Next I must create the keyboard and mouse for this device.
