VFX Final Project – Submission

My final VFX project had many different ideas over the course of it being made, originally I wanted to do something with portals however many other people had this idea so I decided to change it up, I then began to create my storyboard and rather than just having one short 7 second clip I chose to make a mini story using two different characters played by Kurtis.

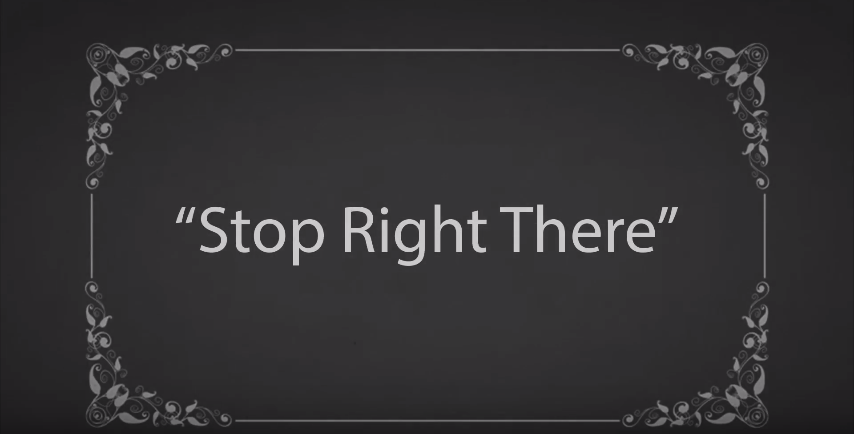
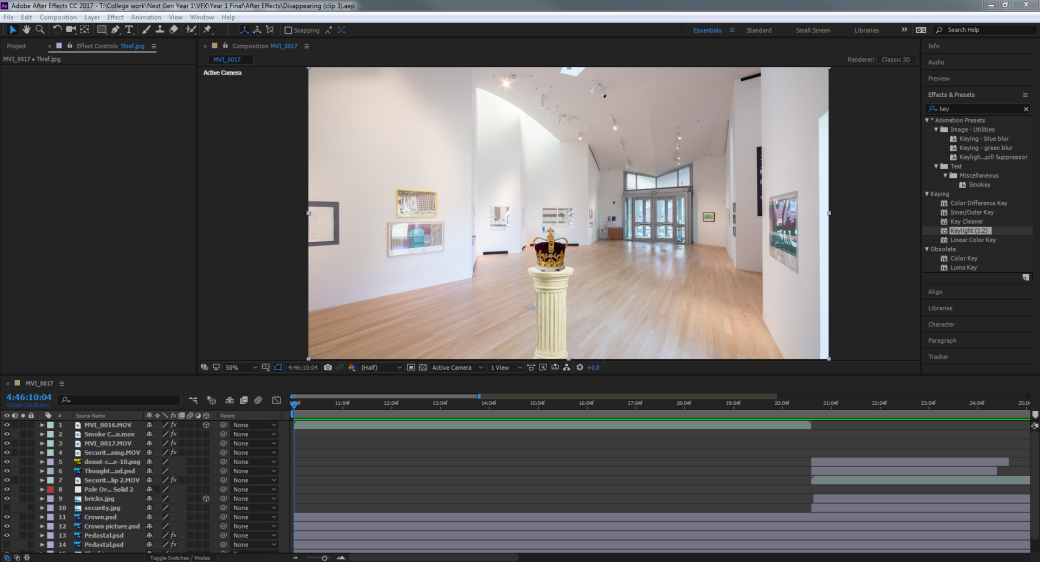
The clip opens with a thief stealing a crown from a museum and replacing it with a picture of the crown, he then wakes up the security guard and tell him to stop, the thief then proceeds to grab a smoke bomb / magic ball out of his pocket which he uses to escape. The security guard it then left confused.

I used a few different techniques to put all of this together, I used after effects to create the project. Below is a list in order of what visual effects went into my project.

  • Black and White colour change
  • Projector style film overlay
  • Keylight on the green screen which was replaced depending on the scene
  • The crown being wiped out and the picture appearing
  • Thought cloud overlay on security guard which becomes opaque.
  • The smoke / tornado
  • The main footage is then linear wiped so the thief has disappeared.

There are also some other minor tweaks to the background that are not worth noting separately.

The scene ended up being around thirty seconds long and I am pretty proud of the result as this was my first attempt at a proper vfx scene. The idea to add the old fashioned look also came on near the end of the development as before I added it, the scene looked pretty plain and boring and now it has a unique feature. The lack of sound effects also now makes sense as its supposed to look like a silent movie.

Maya Space Project – Bench

Today me and a few friends decided to begin to work together on a spaceship environment after we went to see Alien: Covenant. We have created an assets list within a google drive and are gonna begin to develop multiple assets for this environment. I began by creating a pretty simple bench that looks like it belongs in space. I started by creating all of the separate shapes that would make up the bench, this was so they were easier to UV unwrap. Once this was done I began to UV unwrap and texture the model.

I used this as an excuse to revisit some practices that I used primarily at the beginning of the year, I used the checkerboard to make sure that each face was relative in size with each other.

UVs

I think that my UV management was very nice and clean which made it very easy to apply the textures. Uv layout

The colour scheme that was chosen was white grey and red, this is because these are nice clean colours and they go well together. The space station that were are creating will have a clean look about it rather than old and worn.

So far

This is what the bench looked like once the textures were applied and the shapes were put together. At this time I am not sure if I will revisit the texture to add more scratches into it or leave it looking cartooned. I will also be adding some normal maps to the bench to add extra detail into it.

Done Kinda

Recreating my Portfolio

Over the last couple of days I decided to completely scrap my old portfolio and build one from the ground up, this was to make sure that I only have the images and videos that I would like to include in my portfolio at this time, I also changed the whole general layout by removing a lot of the words within the slides so that it was mostly image based. I changed the layout of the images so that they filled more of the screen and titled each slide accordingly. My feedback from my original portfolio was as follows..

  • Put three or less images per slide
  • Give significant images there own pages
  • Create high quality Animations
  • Use more images rather than text when explaining games story
  • Continue to self reflect
  • Try and choose a focus point for my work

I feel like I am beginning to hit most of this criteria and I have also been putting a lot of thought into what I would like to specialize in next year. I have also been using the brief to help me to know what I must include within the portfolio as I need aspects from every area.  I will be continuing to work on the portfolio until the day I must present it.

portfolio.PNG

VFX Final Project – Adding More Effects

On Thursday I began to work more on my final VFX project, at this point of time I had all of my clips in the correct order and I also had most of the effects already added in. However after watching it through a couple of times and tweaking some smaller things I had noticed that it still looked pretty plain even though I was almost finished. Another problem I had was that I could not find any good sound effects to go into the video and it looked strange without sound. Because of these issues I decided to change the theme of my project to a silent movie to add more comedic effect. This effect took me a while to add but I eventually got it done, I also added in black screens that would include what the character was saying at that specific moment.  This adds an overall better touch to what was a pretty plain video. Currently the video is around 30 seconds long and all I have left to do is export the video. Capture

Capture 2

VFX Final Project – Adding the Effects

Last week after I had taken the footage I began to compile it together chronologically and add the effects to the scenes. The main effect is the teleportation of the character through the use of the smoke. However other smaller details have also been added into the different scenes such as removing the green screen using Keylight and adding in the backgrounds, other than this I also added other images into the scenes such as the object that is stolen. I also removed a person from the background of the image by duplicating and masking that part of the image. Overall I have 16 layers which makes this the largest project that I have undergone to date, especially as I am using more than just one shot of footage.  Overall the footage lasts around 30 seconds.

Capture.PNG

VFX Final Project – Shooting the Footage

After a couple of weeks of research into how I could do my final project a couple of us booked out the studio room which has a green-screen and also a camera. This allowed us to be able to shoot the footage that would be needed for the final project. My piece will consist of a couple of different shots and I have got Kurtis to be the actor for this. Because the shooting is done I am now able to drag these files into After Effects and begin to edit the footage together.

Creepy Character Creation Design

In art today I began to create some designs for a creepy concept, I created two designs using Photoshop by overlaying different parts from different creatures.  The first animal I chose was an owl as I already thing they are weirdly shapes. I then grabbed a sharks mouth and placed this over the eyes. This is very unusual which I think helps with the creepy factor, rather than having eyeballs it has a gaping hole with teeth around the outside. I then grabbed a koalas nose and placed this over the owls beak and I also added a mouth to the bottom of this. I quite like this design however after I placed the mouth onto it I had another idea in my mind.

Capture

After I placed the mouth onto the owl I had the idea of grabbing an inanimate object such as a teddy bear and adding human features to it. I think this is very strange as it gives it a cute creepy feel which is two complete opposites. I did this by placing two human eyeballs over the bears little pea sized eyes.  After this I added a mouth to the character. I think this has a weird effect as teddy bears would not usually have human features. They are also supposed to look friendly.

Capture2

The next stage will be drawing this design up either in photoshop or on paper.

High Poly Group Project – Beginning Development

Today I began to re develop my Harpoon Gun and I decided upon a completely different design, rather than one a character could hold with two hands its more of a large turret which could be placed into a position. I think this is a more interesting approach as the detail on this weapon will be able to be seen in the larger scene. I have began to UV unwrap some of the objects that make up this larger object and the next step will be to finish unwrapping and begin to create the high poly version.

harpoon.PNG

VFX Final Project – Set up

Over the last few weeks I have been doing some preparation for my final vfx project, this consisted of thinking how I could shoot the footage and how I could also edit it. As my storyboard was done i have a general idea of what needs to be done. I was going to start shooting the footage yesterday however I could not as the rooms were all booked however I was able to rent out a camera to have a play around with it to get used to what I would be using.

Evolution of Games Design – Super Mario

Super Mario was first released on the Nintendo Entertainment System (NES) and it revolutionized the gaming industry due to its simplistic level design and mechanics. The NES was released in 1983 and the game is still talked about today.  Due to the console being so old this game was very limited in what it could be and because of this the art style is made up by 8 bit sprites. However this style today is very iconic and memorable even to later generations such as myself. The games main mechanic is running and jumping which could be done by the player quite easily due to the simplicity of the Nintendo controller.

Image result for nes controller

As the controller did not have many buttons the mechanics of the games did primarily come down to running as jumping as this was the play players would navigate through the level. Due to the character within the game being so iconic he is still around today. Some of these games are just sequels to this original game but it has also spawned many different spin offs that have completely different mechanics such as Mario Kart & Mario Galaxy. Super Mario kart used to be played using the buttons on a controller however this has evolved into motion controls such as in the Wii and Wii U. All of these different titles were created because of the success of the simple 2D plat-former.

Image result for original super mario

As the consoles have developed the games have seemed to improve in some aspects, as the newer super Mario bros games can be played on Co-op with friends.  Due to this series being so old I Believe that the target audience could potentially be any and all ages for this franchise due to when they release new games there may be older players who are still fans of the game but the developers may also aim towards bringing in younger audiences to play the game to further increase the amount of players.