
Last week I made some pretty good progress on my Ident, I had added small details into the robots movement so that it looked more fluent and realistic. I then batch rendered all of the frames and inserted them into a adobe premier project and an image sequence. This week I began to add more detail into the animation using Adobe Premier, firstly I added some transitions to the end of the animation which give it a fading effect as text fades in which is my last name with productions after it. Once I had perfected this by moving them around in the timeline I sourced some sound effects from various websites.This was to make the animation feel more alive, however from this in the future I have decided that I will source some audio in the planning stage so that I can time my animations better with the audio.
Month: January 2017
Game Development Exam Prep – Magnitude
In Ant’s lesson today we began to look into Magnitude and Pythagoras. Magnitude is the length of the vector and Pythagoras is hat can be used to calculate the longest length of the triangle.
2D = Magnitude squared = x squared + y squared
3D = Magnitude squared = x squared + y squared + z squared
This can commonly be used to work out the distance between 2 objects.
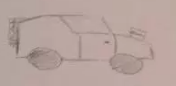
Other than this I also began to look into what art style I may want to use for my game I create in the exam, I began to create arrow with a pixel art style but stumbled upon a more smooth design which I prefer.
![]()
VFX – Lighting
In adobe after effects I added in a logo and to make it loo more dramatic I added in some lighting, this weeks topic was lighting and how it can improve images. The first light I used was a point light and it was placed behind the logo so that it creates a shadow on the plain below to give it a 3D effect. Other than this I also added in a spotlight to light up the logo. I also added in a oval solid with two different effects on it to give it a dramatic effect. This was the final product. I like the look of it however I could not make the logo more clear.

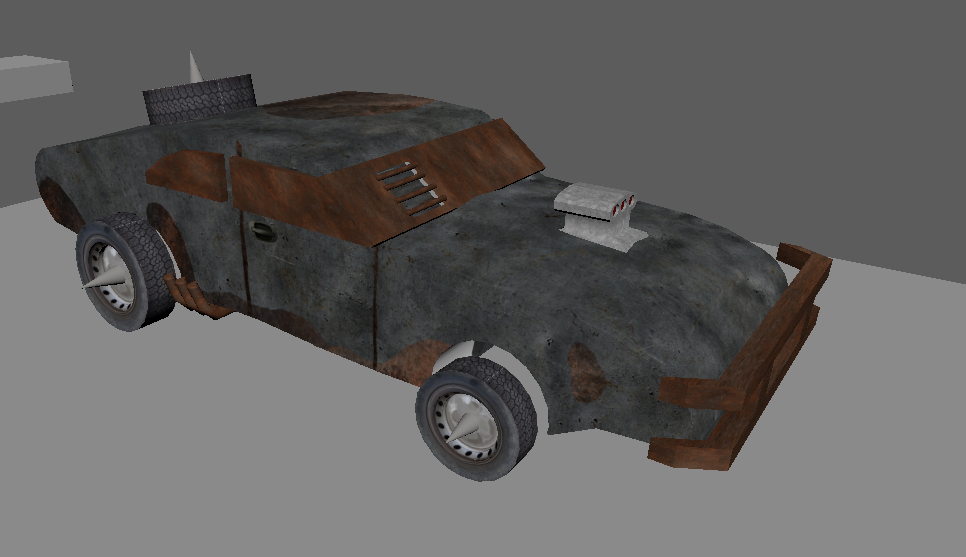
Dystopian Vehicle – Development
After deciding which general sketch was my favorite and began to adapt it and make a model using the basic concept of the car, I have took a large amount of inspiration from Mad Max because that is the sort of dystopian future that I wanted my car to be from. So far I have put about 4 hours into this vehicle and I am still not done, I keep adding more detail into the textures and also adding smaller components, so far I have the main shell of the car, some side exhausts, tires and an engine. The tires, engine and shell have all been UV unwrapped and textured using Photoshop. By using knowledge I have gained over the previous weeks I have layered some textures so that it adds extra depth to the design. Rather than having the car a solid colour I have added in rust and detail. So far I am really proud of my vehicle, this is the largest single model I have created to date.
My Ident – Production & Batch Render
Last week I began to develop my animation and I had all of the main key frames in, this week i went through and added some smaller touch ups such as adding more physics to the robot such as its tail moving as the robot moves to give him that extra layer of detail. I also added a large plain to the animation and added a background shader to it, this allowed my animation to have an endless white space. Once this was done I changed around my render settings and then batch rendered all 150 frames. I then put the frames as an image sequence into adobe premier and exported it. I have pasted the finished result below however I will be doing small tweaks next week.
Animation Analysis – For the Birds.
Appeal – The birds used within the animation are very cure due to there big eyes, beak and the colours used. Even though the birds are simple in design the use of eye shape helps the viewer to understand what the bird is thinking. The big bird is supposed to be favored by the viewer so he is more unique and even has his own sound.
Anticipation – When the big bird jumps onto the wire it slowly begins to stretch downwards, due to this the viewer begins to anticipate that there is tension building. The big bird then falls off which causes the wire to shoot up.
Exaggeration – The size of the birds beaks and eyes seem to be exaggerated and also at 2.27 when the wire shoots back up the feathers stay in position for a few seconds until they begin to slowly fall, this emphasizes how fast the birds traveled.
Staging – We can see that the smaller birds are arguing among each other until a large unique bird comes along which seems pretty simple minded, through this the smaller birds begin to pick on it and become angry and try to get the big bird off the wire. When the bird falls off the wire but its hanging on with his legs the camera zooms and emphasizes on this.
Slow in Slow out – When the large bird lands on the wire it begins to slowly stretch and then speed up.
Secondary Action – The birds feathers getting left behind and the wire bouncing are both secondary actions.
Trigonometry + Classes
In Ants’ lesson we looked into trigonometry and it’s usefulness in games design. An example of a use of trigonometry is working out the movement speed of a vehicle. Trigonometry is the study of triangles and the relationship between the lengths of the sides and the angles that are between them. SOH and CAH will be used to calculate the change in position.
Sine = opposite / hypotenuse – SOH
Cosine = adjacent / hypotenuse – CAH
Tangent = opposite / adjacent – TOA
Radians are a different version of degrees that are used more in code. 2 pi radians is a full rotation of a circle.
Radians = Degrees / 180 * Pi
Degrees = Radians / Pi * 180
Other than the above we also looked into classes and class diagrams. A class is like a blueprint. The C# files that are made in unity are like blueprints for components that can be added to the game objects. Classes will map out all of the properties that the object needs and the actions that will occur. Some classes already exist in unity such as a transform. Class diagrams are what help us design the class before we begin code. The class diagram comes in three stages.
Transform -> Properties -> Function
The first cell is the name of the class, the second cell is where the properties are listed and this may also include information on what the property contains, e.g. Vector3. Finally the final cell contains a list of the actions, the parameters may also be listed in brackets after the function, along with data types.
Ship -> moveSpeed:float -> MoveForward():Void.
Maya – Luke Skywalker Lightsaber
I tried my best to try and recreate Luke Skywalkers’ lightsaber from Star Wars Episode 6 in Maya, I really think it turned out pretty well. I hadn’t really used any new tools when creating this however I have discovered a new type of shader called a surface shader that allowed me to add the extra glow to the lightsaber when I rendered it, however I had to use the Maya software rather than Arnold, because of this I also did a few renders of just the hilt.
My Ident – Early Development
From the previous lessons I had a small amount of experience in the creation of animation, because of this was I was to put the main key frames into the animation and use pose to pose animation. For the robot I used pose to pose but because the animation involves dominoes to give it a more natural fall I did this in straight forward. So this animation will be developed using a hybrid of the two. I am still in the early development process however so far I have animated the robot bumping into the dominoes and the dominoes falling. I still need to tweak the dominoes slightly and I also need to fill in the gaps of the robots animation as so far it only has the key poses in. I still need to make the robot look around a little bit and I also need to add a bend deformer to the tail when it moves to make it look more realistic. This is what I have so far.
In the lesson we were introduced to cameras and how they can be used to gave a fixed point of view on the animation. You can also move the camera and add in key frames so that the camera follows a certain path. Using the panels tab we can also change our view to the cameras perspective. Using this knowledge I will be able to placer a camera into the scene that will pan above the dominoes once they have fell.
2D Game (Coding and Maths Skills Development)
Research –
Firstly I needed a simple concept for my game to get some ideas of what mechanics I can use and a basic concept for my game. I researched into some games for some inspiration.
- Pong
- Frogger
- The Worlds Hardest Game (Flash)
- Space Invaders
- Galaga
- Flappy Bird
- Falldown
From this I am going to begin designing a game that has features from a few of these games, the basic premise of the game will be to get the character from point A to point B.
The features that I may include are:
- Collectibles
- Score
- Time Limit on levels
- Collidable objects that if hit will make the level reset
- Movable main character
- Levels
Environment & Character Ideas –
- Simple coloured background (Geometrical Shape)
- Space (Spaceship/UFO)
- Underground (Minecart/Mole/worm)
- Sky (Plane/Bird)
- Sea (Sea creature/boat)
